How To Replace a Sliding Patio Door Handle and Mortise Lock
This guide will help you install your new sliding door handle and mortise lock. This is a general instruction guide, and some sliding door handles may require additional assembly steps to install your handle.
The tools needed for this installation:
-
Phillips Head Screwdriver
-
Flat Head Screwdriver
-
Vise Grip Locking Pliers
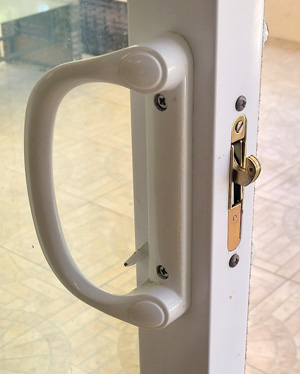 |
1. Begin by opening the door and moving the thumb turn lever so that the mortise lock is in the locked position and the hook is showing. Then remove your existing handle set by unscrewing the two Philips screws from the interior. Be sure to hold the interior and exterior handles in place when removing the screws to avoid dropping.
2. DO NOT take out the 2 screws holding the mortise in yet. Without the handle the mortise could drop down the inside of the door.
 |
 |
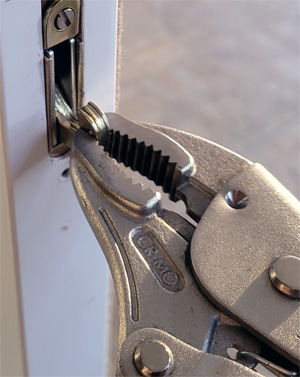
3. Use your vice grip locking pliers by locking it onto the hook of the mortise lock so you have a grip and avoid dropping it inside the door. Remove the two screws on the side of the door securing the mortise lock.
 |
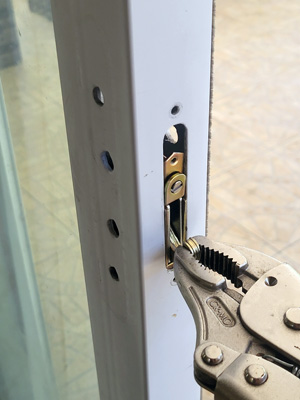
To remove the mortise lock from the door. Push the bottom of the lock towards the glass and then move the lock assembly down inside the hole and pivot the top section out at a 45 degree angle.
4. Now you are ready to install your new mortise lock and handle
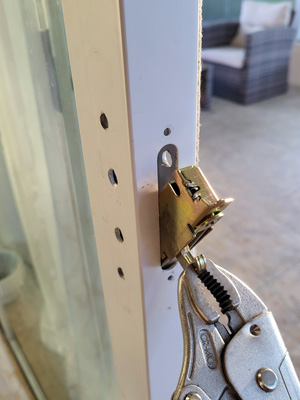
5. Insert the new mortise lock into the door the same way as the removal procedure in step 2. Remember to install the lock with the hook in the upward position. Engage the mortise lock into the locked position. Lock the vice grip locking pliers onto the hook to avoid dropping the new mortise lock inside the door. Insert the new lock into the door at a 45 degree angle, then move the lock assembly down in the cutout of the door. Then push the top section of the lock inside the door and move the lock assembly up so the screw holes align with screw holes on the door and install the 2 screws.
6. Insert the new thumb lever into the slot on the door that engages the mortise lock. Then install the interior and exterior handle with the 2 screws. Be sure to hold the new handle in place while installing the screws to avoid dropping and damaging the handle. a. Some handle sets include a new keeper or strike. If so, remove your existing and install the new one in the same position as the existing one was located.
6. Test functionality. If the hook engages when you flip the lever and locks into the keeper, you are good to go! a. If you can still open the door after flipping the thumb lever to lock the door, you may need to check the alignment of the mortise lock keeper and the door itself. Ensure the door is square by closing the door just enough that a gap of day light can peep through. Check to make sure the gap is even from the bottom to the top of the door. If there the gap is not even, you will need to adjust the rollers. b. To check the alignment of the mortise lock hook and keeper: With the door in the open position, engage the lever to the half-way point so the hook comes out. Close the door slowly and look where the hook is aligned. It should be just under the top lip of the strike that it locks onto so when the hook comes out and goes up it locks onto the keeper.
